DIY-Painted Floors!
- Shelley Hodge

- Feb 6, 2020
- 6 min read

It’s not uncommon for me to say “you know what would be a great idea” and Brad cringe under his supportive but unconvinced smile. Usually, my ideas come with a lot of work, mess or necessary assistance. In the case of the painted floors, only 2 of 3 are true!
Painting a tile floor is both time consuming and a little messy but oh-so-doable and the end result will help you forget this conversation ever happened.
I have held onto pure hatred for my bathroom ceramic tiled floor since purchasing our home in 2011. One of the last remaining rooms slotted for renovations, I was looking for a “band-aid” effect in order to live out the remainder of its time in harmony. Which is how I found about painted tile floors! ( It’s not my idea obv, but you can’t reinvent the wheel can you!) What started out as an “oh well if it doesn’t work, we will replace it in a year” to “holy shit!
I want this painted floor look when we renovate!”
This is proof that with the right products you can paint most ceramic floor tiles in a lasting beautiful pattern that will cost you a fraction of having to replace existing floors!

I am a big believer of if you hate it, paint it. And lucky for me (and now you!) painted floors are trending in a big way so there are lots of beautiful examples out there. However, there are many examples but not a lot of info on the best techniques and materials to use that will last. Another thing I found when sourcing my materials was that the majority of the instruction available was American and while we love our neighbours to the south, there often are a lot of products unavailable in Canada or in isolated areas like mine.
It was a big learning curve but I’ve worked out the bugs so you don’t have to!
This tutorial should come with a note! If you’ve ever worked with paint and stencils you know that the final product is far from perfect. No matter how good the stencil adhesion, you will get some paint bleed.

So do not be fooled by those tutorials that look otherwise. After my stencil was complete I went back in with a fine paintbrush and the background colour and tighten up the lines and eliminate the bleed.
Materials list:
Cleaning agent like TSP or mild dish liquid
Stix waterborne bonding primer
Painters Tape- Green Frog tape is bar far the best
Latex paint mixed the desired background colour I used the Aura line from Benjamin Moore Simply White OC-117
Latex paint mixed in the desired stencil colour. I used Aura line from Benjamin Moore Space Black 2119-10
Vinyl Stencil- Mine is called Aztec from Cutting Edge Stencils They have the best quality stencils and each tile stencil have guide lines for the specific size tile you are covering.
Small foam roller and cage- You will need 4 foam roller sleeves for this project, one for every colour and or change in product.
Paint trays to match size of foam roller. Again you will need as many as different paint and or product your are using
Adhesive Spray
Stiff haired stencil paint brushes. You can get these here when you buy your stencil.
Verathane waterbased interior topcoat. Make sure its the non-yellowing formula
Wide all-purpose paintbrush
Here we go!

Step 1: Prep & Product
First thing first. You need to prep your floor for paint. Stix primer says not to use any harsh chemicals on the surface prior to its use. However, in my case, my bathroom tile is old as the hills and gets lots of use as it’s our main bathroom. I wanted it to be as clean as possible.
As with most paint projects I wash all surfaces with TSP to get ride of dirt and grime and bring the surface back to square one. Once I cleaned the tile with it using a sponge, I waited for the floor to fully dry and then I cleaned it again with just fresh water 2 or 3 times letting dry in between to ensure that all the TSP was gone.

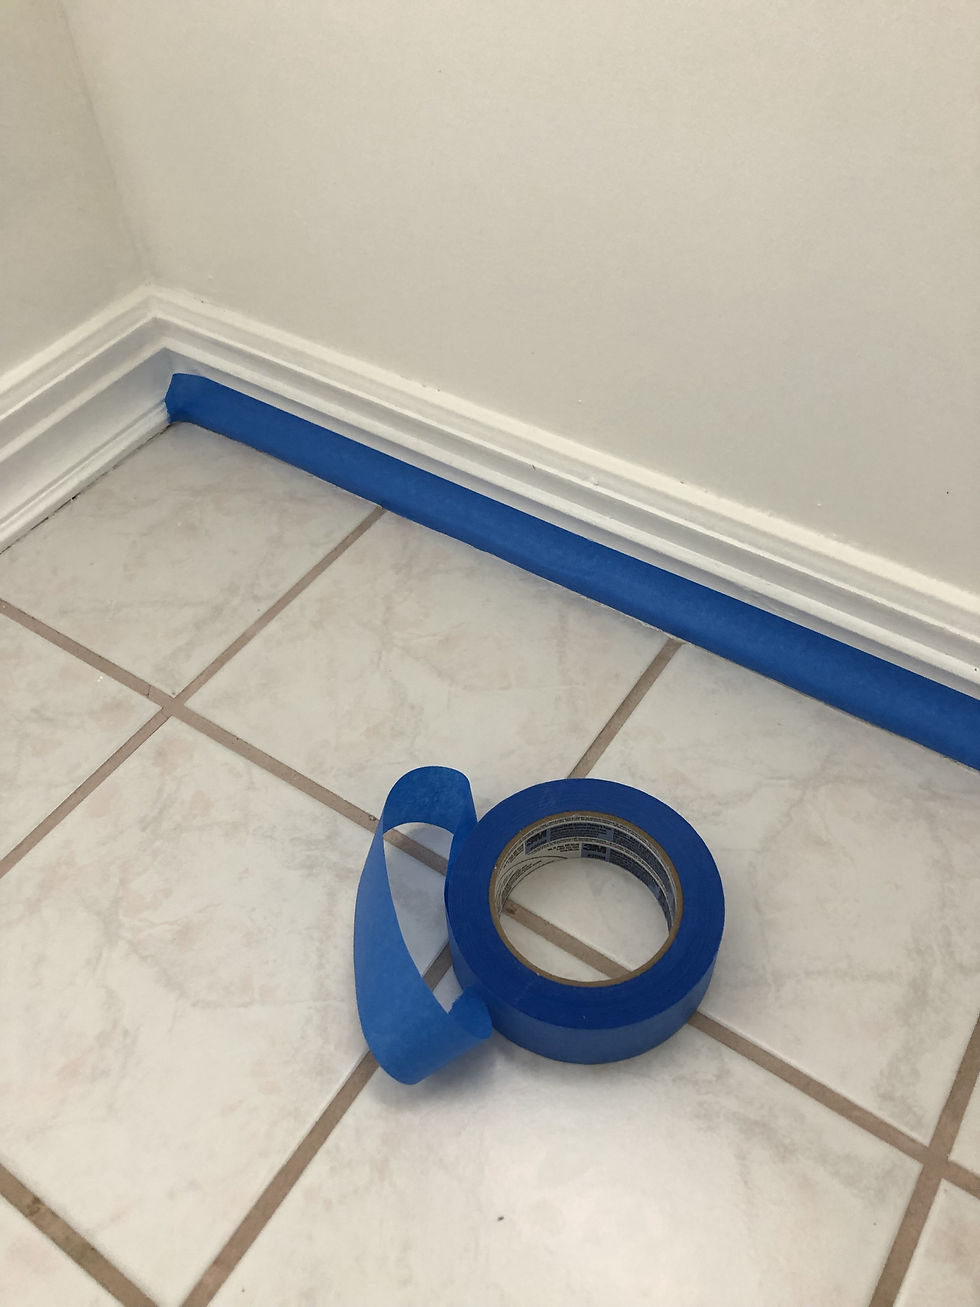
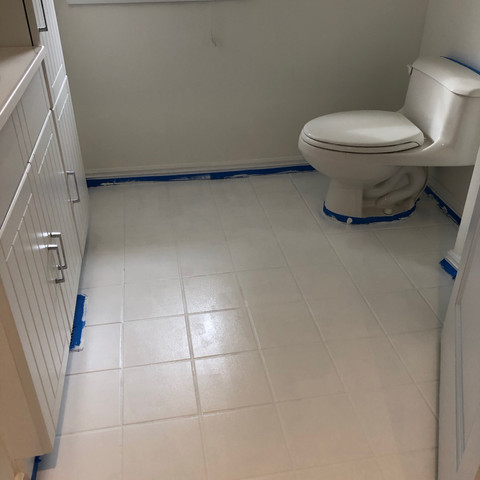
Tape all unmovable fixtures including toilet (unless you want to take yours off for this project. I opted not too because I have no idea how to do that! ) vanity, shower base, baseboard etc. Anywhere that you don’t want paint, tape! In my photos you can see that I used blue painters tape. What a mistake. I read a few tutorials that said to use the blue. Save yourself heartache at the end of your project and use the tried and true green Frog Tape It is so much better to remove. I still have bits of blue tape that, short of cutting up my baseboards, will not come off.

Step 2: Prime
When priming tile floors with Stix you want to follow less is more rule! Better to do more thin coats than thick coats to ensure that the product adheres as it's supposed to. Stix you will come to realize is nothing short of magic. I have never used a primer like this! It's a little workhorse for all sorts of paint projects because it literally sticks to everything! Use it on furniture, metal and a mired of other surfaces. I did 2 thin coats with 6-8 hours drying in-between. You shouldn’t see any of the original floor colour on the last coat. Let completely dry for 24 hours.
Step 3: Paint background colour
Now start to paint your base coat colour. You can apply this a little more liberally than the primer but I would still take the time to do thin even coats. I did 2 coats with about 4 hours drying in between. The goal is to hide the primer colour. Let dry 6-8 hours or overnight.

Step 4: Stencil
Now comes the fun part (and admittedly the most stressful part!) Your stencil comes with guidelines which are amazing. Because of that there is no guesswork as to where to start each new stencil block. They’re indicated as offset designs on the stencil itself.

Follow instructions in your stencil tile package on these pretties for further instruction.
Stencil 101 is use very little paint on your roller and do multiple coats. And when I say very little I mean like barely any. And the trick is to use spray adhesive on the back of the stencil to get a good seal on the tile.
Spray the back of the stencil lightly with the adhesive and let dry until tacky. The wetter it is the more glue residue you will leave behind. The less tacky the stencil is the more opportunity for your stencil paint to bleed. It takes a bit of practice but once you do, the entire process will get faster.
Press the stencil onto the first tile. It’s up to you where you start and you will have to move around the bathroom as the paint from each tile dries. Start somewhere less obviously in case you mess up. (Its only paint so if you mess up, repaint your mistake with background paint, let dry and start again)
Roll your roller into the stencil paint thinly and then roll excess paint off onto a paper towel. When I said barely any I really meant it. Roll the paint over your stencil gently. Don’t press down or the paint will seep through the stencil and you will have a lot more lines to tidy up after.
Remember: less paint, little pressure
Repeat this step until you have the desired coverage. Because you are using very little paint, you will need to roll over you stencil multiple times to get the desired saturation. I rolled each stencil about 4-5 times each.
Gently peel the stencil off. The adhesive should be sticky for another couple of tiles so use your guidelines and paint another tile.
Tip: You will have to bend and move your stencil to fit around your toilet and or baseboards. Do these parts last incase you need to cut your stencil to make it bend more effectively. Or purchase two stencils and use one for this part.
Step 5: Clean up lines
Now that your tiles are all stencilled and your patience has paid off hopefully you have no paint bleed at all! If that is the case you can skip this part. But if you are like me and have very limited stencil experience, you gonna need to clean up that mess!
Tip: I used my small artist brush with the white background paint and tidied up the black stencil paint that bleeds through the stencil making the lines look as straight as possible. Its a tedious job but it's so satisfying once it's complete! Let stencil paint and touch paint dry 12-24 hours.
Step 6: Prep for your Varathane top coat!
Everything sticks to Varathane while it dries so you will want to dust your painted floor really well first and get that topcoat on immediately after. It’s a good idea to turn off heaters, furnaces and air conditioners in the room you are working to minimize dust movement. You want a good even topcoat free from dust and debris bumps.

Let dry for 24-48 hours before you walk on your new painted floor or lay bath mats.
Don’t forget to peel off your painter's tape!
Because you used latex paint and non-yellowing Varathane, your floors will look great for a long time. And maintenance is a piece of cake! Use a floor cleaner that’s safe for varnished floors. I still use a little Mr. Clean when I mop my floor and there has been no change in the colour or wear since it was painted 6 months ago!
Follow us on our social media for weekly design inspo, creative living ideas and new things on the blog!


Japan is the country that knows well to stand up with the pride after
falling down. They know how to struggle to achieve their success. Tokyo
is the main hub of the economy of Japan. So the
https://tilerstoowoomba.com.au/ also publishs many articles on the
financial state of Tokyo.